Crochet Teddy Bear Specs Case (Glasses Holder) Tutorial
Introduction
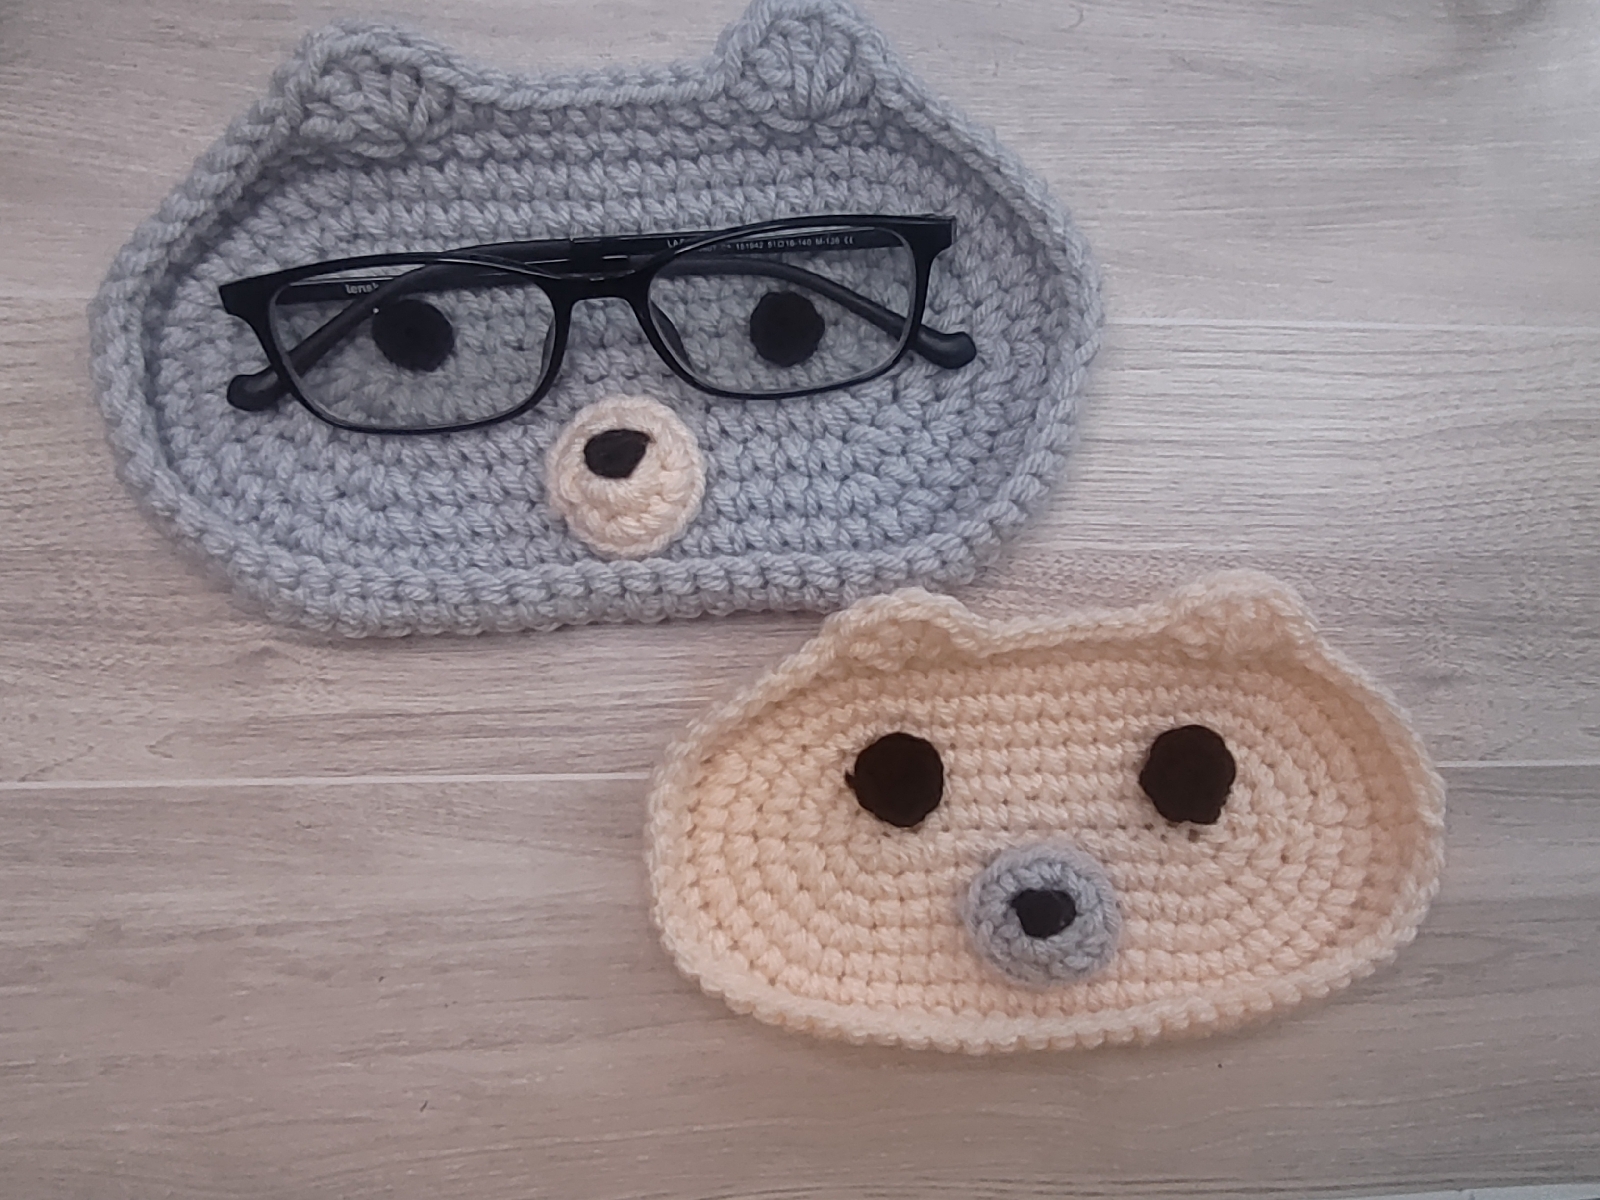
Keep your eyeglasses safe in a cute handmade pouch! In this tutorial we’ll make a crochet teddy bear glasses holder (also called a specs case). Starting with a simple oval base, we’ll build up the sides and then add little bear ears, eyes, and a muzzle. This project is beginner-friendly and uses basic stitches (chain and single crochet). You can customize the colors to match your style. Follow the steps below or watch the video tutorial for a visual guide. This adorable case makes a great gift or desk accessory for any glasses wearer.
Materials
- Yarn: Medium worsted weight (4-ply) acrylic yarn – main color and contrast color for details.
- Hook: 4.0 mm (G) crochet hook.
- Other supplies: Stitch marker (to mark rounds), tapestry needle (for weaving ends), scissors.
- Optional: A small amount of black thread or yarn for embroidered nose detail, and glue if you prefer to attach the eyes rather than sewing.
Pattern
Row 1 (Base): Make a slip knot and chain 12 (foundation chain). Mark the 12th chain. Work 2 single crochets (sc) into the first chain (this is an increase). Then make 1 sc in each of the next 10 chains (that makes 10 sc). In the last chain, work 4 sc (for rounding the end). Now continue on the other side: work 10 sc into the back loops of the foundation chain (opposite side). You will have 4 sc at the other end, so work 2 sc into that last chain to match the other end. Slip stitch to join. (Total = 28 sc)
Row 2: Ch 1 (does not count as st). Work 2 sc in the first stitch (inc), and 2 sc in the next stitch (inc) – two increases at the start. Then *1 sc in each of the next 10 sts* across the side. At the curved end (where 4 sc were in one st), work 2 sc into each of those 4 stitches (4 inc). Continue 1 sc in each of the next 10 sts on the opposite side. Finally, work 2 sc in each of the last 2 sts (two increases to mirror the beginning). Slip stitch to join. (Total = 36 sc)
Row 3: Ch 1. Work *[2 sc in next st (inc), 1 sc in following st]* twice (repeat inc, sc twice). Then make 1 sc in each of the next 10 sts along the side. Next, work *[1 sc, 1 inc]* repeatedly through the 4 stitches at the curved end (performing 2 inc total). Continue with 1 sc in each of the next 10 side sts. Finally, *1 sc, 2 sc in next st (inc)*, repeated twice. Slip stitch to join. (Total = 44 sc)
Row 4: Ch 1. Work the sequence: 1 sc, inc, 1 sc; repeat three times (so you do three sets of “1 sc, inc”). This shapes the curved ends. Then 1 sc in each of the next 10 sts along one side. Next, on the second curved end do the same four repeats: (1 sc, inc) three times, ending with 1 sc. Then 1 sc in each of the final 10 side sts. Slip stitch to join. (Total = 52 sc)
Row 5: Ch 1. Repeat the pattern: inc, 3 sc; inc, 3 sc. (That means [2 sc in one st, then 3 sc] two times.) Then 1 sc in each of the next 10 sts on the side. Now do: 3 sc, then inc, then 3 sc, then inc. This creates a gentle curve. Finish with 1 sc in each of the last 10 sts. Slip stitch to join. (Total = 60 sc)
Row 6 (Base Shape): Ch 1. *2 sc, inc; 2 sc, inc*; repeat twice (this shapes the ends). Then 1 sc in each of the next 10 sts along the side. Repeat *2 sc, inc* one more time (two more repeats). 1 sc in each of the final 10 sts. Slip stitch to join. (Total = 68 sc) This completes the oval base of the case.
Row 7 (Basket-Weave Edge): Ch 1. Insert hook in the front loop only of each stitch around, and make 1 sc in each stitch (68 sc). Slip stitch to join. Working into front loops only creates a nice turned edge and gives a woven texture at the top.
Row 8 (Bear Ears): We will add two ears. Start by making 10 sc along the stitches. Skip 1 st, then in the next st work a shell of 5 dc (double crochets) all in the same stitch – this forms one ear. Skip 1 st, then work 1 sc. Then work 8 sc along. Now for the second ear: skip 1 st, shell (5 dc in next st), skip 1 st, then 1 sc. Continue by making 1 sc in each of the remaining sts across. Slip stitch to join. (Total = 44 sc around the end row, with two ears formed by shells.)
Fasten Off: Ch 1, cut yarn leaving a tail. Use a tapestry needle to weave the end through several stitches on the edge and trim the excess. Your oval bear-base is finished.
Making the Eyes: Using black or dark yarn (cotton thread recommended for small eyes): Make a magic ring, ch 1. Work 6 sc into the ring. Pull tight to close, slip stitch to join. Fasten off and leave a tail. Repeat to make a second eye. Attach these to the front of the case (use a bit of glue or stitch them on) symmetrically as eyes.
Making the Muzzle (Beak): Using a contrasting color for the nose (e.g. gray): Make a magic ring, ch 1. Work 6 sc in the ring, pull tight, slip stitch (6 sc). Rnd 2: Ch 1, work inc in each stitch around (12 sc). Slip stitch, fasten off with a tail. Weave or glue this circle onto the front below the eyes as the muzzle.
Embroidering the Nose: With black yarn or thread, sew a small “V” shape on the muzzle to form the nose. You can twist yarn to make a thick stitch or simply backstitch a triangle. Secure tightly and trim ends.
Now assemble by positioning the ears, eyes, and muzzle on the base. Glue or sew them in place. Your cute teddy bear glasses case is now complete!
Tips
- Use a stitch marker: Mark the beginning of each round to keep track easily.
- Work ends neatly: Keep a long yarn tail and tuck it while crocheting so you can weave it in later without too much effort.
- Minimize gaps: If holes appear at the joins, a simple slip stitch or extra sc can close gaps. You can also block the finished piece gently to even it out.
- Yarn choice: Acrylic or cotton yarn works well. Cotton thread is great for small eyes to avoid scratching glasses.
- Customize size: To make the case larger, start with a longer chain. The rest of the pattern remains similar.
- Safety eyes: If using safety eyes instead of yarn eyes, avoid letting them poke glasses. Embroidering with yarn is safer for eyewear.
Watch the Full Tutorial:
Social Links
Follow DIY KraftZ for more crochet patterns and tutorials:
Kawaii Glasses Holders Crochet Patterns Bundle | Fox Pattern, Sheep Pattern, Unicorn Pattern, Pig Pattern, Penguin Pattern, Koala Pattern
No comments:
Post a Comment